An effective way to give a bathroom a brand-new appearance without completely redoing its tiles is painting them, though doing so regularly could cause its paint job to chip under exposure to high humidity and temperature levels.
Painting tile requires using the proper technique and bathroom-specific paint. Before beginning this project, surfaces must be thoroughly cleaned and repaired prior to applying primer and paint.
1. Cleaning
Cleaning bathroom floor tiles is an essential task every homeowner must complete at least once every week in order to prevent dirt build-up and staining of their tile surfaces and grout lines. A vacuum, duster, broom and dustpan are great tools for collecting and removing dirt particles from both tile surfaces and grout lines.
As an eco-friendly way of eliminating mold, mildew and other stubborn stains on tiles, use baking or bicarbonate of soda and water as an antimicrobial solution. Scrub the tiles using a stiff bristled brush before thoroughly rinsing to ensure all solution has been eliminated from your surface.
Large chips and cracks in tile surfaces may be filled using siliconized caulk, which will blend in seamlessly with both its color and that of surrounding grout when dry. Ceramic filler may be an option as an even more permanent repair solution.
2. Repairing
Though tile is generally durable and easy to maintain, it may become damaged over time and need repairing or replacement. Sanding and priming offer solutions to restore damaged areas.
When painting over tiles, it’s essential that all steps be followed meticulously; otherwise you could end up disappointed with your results. If any step is skipped over, this could result in subpar results.
Before painting tiles, they must first be thoroughly cleaned to remove dirt, mold, grease or food stains that might prevent paint from adhering properly. Sand and scrub the tile prior to painting as this helps reduce heat and humidity from breaking down the paint over time. In high moisture areas it may also be beneficial to use specialized paint that stands up well under humidity – this will extend its life!
3. Primer
Applying a primer before painting tiles will ensure the paint adheres properly, creating an even surface and improving aesthetic appeal. Skipping this step may result in less-than-ideal results and could leave an unappealing finish behind.
Water-based latex primers are generally safer than oil-based ones; apply generously and cover all areas where there is previous paint with this application of primer using a brush.
After your primer has set, lightly sand the area that you plan on painting to reduce heat and humidity damage and cracking of the paint over time. Next, use a foam roller to evenly apply color across large expanses of tile at once.
4. Paint
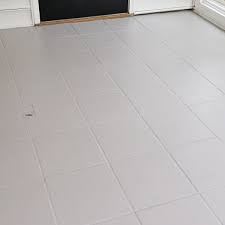
If your tile floors have become outdated and in need of an update, but full renovation isn’t in your plans, painting may be an affordable way to give them new life. Painting them gives you more customization over replacing them altogether while remaining relatively affordable when compared to replacing the entire floor with new tiles.
McCoy suggests it is essential to begin by thoroughly cleaning the tiles. Once cleaned, she used 120-grit sandpaper to rough up the surface so the paint would adhere more easily; afterwards she rinsed and dried with a tack cloth.
She first applied an alkyd urethane primer, which helped the tiles adhere, before applying high-quality epoxy floor paint. She recommended waiting 72 hours to allow the paint to fully cure before walking on or rearranging furniture on it; seven months later, they still look fabulous.
5. Sealing
Paint jobs on tile should stand up well under normal usage without scratching or chipping; however, like all surfaces they can still be damaged by sharp or highly abrasive objects that come into frequent contact with it.
To protect painted tile floors from further damage, they should be sealed immediately following completion. To do this, follow the manufacturer’s instructions for applying sealant directly onto each tile and allow sufficient drying time before walking on or using space. Moreover, floor pads may help further safeguard new surfaces.


